Author: Paul Kurzawinski, Cloud Engineer
Introduction
AWS Elastic Disaster Recovery (AWS DRS) is a service provided and delivered by Amazon Web Services that helps companies ensure business continuity in an unexpected disaster or downtime. The primary goal of AWS DRS is to replicate critical data and applications using affordable storage, minimal compute, and point-in-time recovery in a secondary location to minimize downtime and data loss.
AWS DRS continuously replicates all configured source servers to AWS account, without any impact on the performance of the source servers. In case of any issue or unexpected downtime, the application can be recovered on AWS within minutes. During recovery, it is possible to pick up the most up-to-date server state as a recovery point or choose to recover an operational copy of your applications from an earlier point in time. Point in time recovery is helpful for recovery from data corruption events such as ransomware. After issues are resolved in your primary environment, you can use AWS Elastic Disaster Recovery to fail back your recovered applications.
Getting Started
From the high-level perspective and operational standpoint, the configuration of AWS Elastic Disaster Recovery (AWS DRS) consist of the following steps:
- Initial configuration – Setting up DRS must be first initialized in the target AWS region by creating the standard replication settings. This will create the required IAM permissions on AWS account.
- Planning – Before setting up AWS DRS, it is crucual to assess your organization’s disaster recovery needs. This includes Recovery Point Objective (RPO) and Recovery Time Objective (RTO). This will help determine the appropriate AWS DRS configuration for your business.
- Replication Method – AWS DRS supports various replication methods, such as asynchronous and synchronous replication, and continuous data protection. Depending on requirements, you can choose the most suitable replication method for your workloads.
- Settings definition – Once you have selected the replication method, the next step is to configure replication settings in AWS DRS. This involves adding the definition of the replication schedules, target locations and recovery points to ensure data consistency.
- Validation – After setting up replication, it is crucial to test the configuration to ensure that data is being replicated properly and can be easily recovered in case of a disaster. Regular testing and validation are essential to maintain and ensure the effectiveness of AWS DRS setup.
- Monitoring – Verifying the replication status and performance of AWS DRS setup is important to spot any potential failures or misconfiguration. Performing regular maintenance and updates are necessary to ensure the reliability and efficiency of the whole setup.
Overall, the configuration of AWS Elastic Disaster Recovery (AWS DRS) involves careful planning, selection of replication methods, setting up replication, testing, monitoring, and maintenance to ensure the successful implementation of a disaster recovery solution on AWS.
Implementation
To use AWS DRS, it needs to be set up in each AWS Region in which we want to use it (the AWS Region into which the replication is set, and where the Recovery instances will run). Setting up the DRS service needs a default replication setting and roles and permissions required for the service to run and operate.
The first step for setting up DRS after activating it and enabling is setting the default replication settings. Choose Set default replication settings on the AWS Elastic Disaster Recovery landing page (screenshot #1 below).
The next step is about setting up Replication Servers. Replication Servers are Amazon EC2 instances that are used to replicate data between source servers and your AWS account. The DRS Replication Servers are automatically launched and terminated as needed. To configure Replication server, there is a need to provide two things: the Subnet within which the Replication Server will be launched and the Instance type. The next part of configuration is about defining the Volumes and security groups. A security group controls the inbound and outbound traffic. It is recommended to have AWS DRS to automatically attach and monitor the default AWS Elastic Disaster Recovery security group. This security group has the inbound TCP Port 1500 open for receiving replicated data.
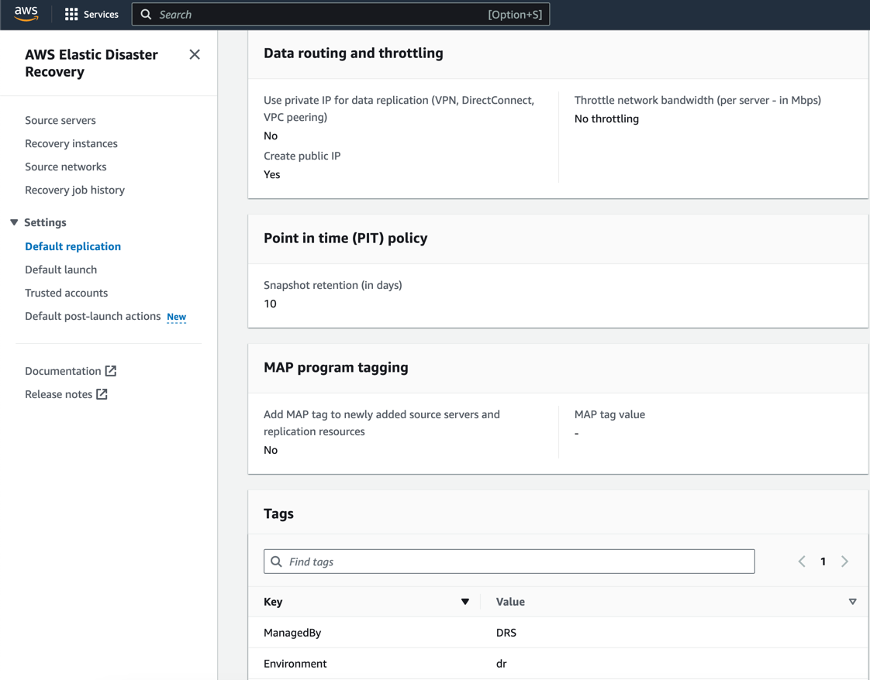
The next step is about defining an Additional setting. This section includes Data routing and throttling, configuration of Point in time (PIT) policy and additional Tags. The Tags section allows you to add custom tags to resources created by Elastic Disaster Recovery in your AWS account.
On the last page of the wizard, you need to Review and create the configuration. The default template will be created, and you will be redirected to the Elastic Disaster Recovery console.
Source configuration, launch settings, and Drill instance launch
Source servers refer to the primary servers or systems that host the critical data and applications that need to be replicated and recovered in the event of a disaster or unexpected downtime. These source servers are the primary source of data that will be replicated to a secondary location for disaster recovery purposes. AWS DRS allows organizations to configure replication from their source servers to a secondary location within AWS, such as another AWS region or Availability Zone. The source servers can be added to Elastic Disaster Recovery by installing the AWS Replication Agent. The Agent can be installed on both Linux and Windows servers.
Once the source servers are added to the Elastic Disaster Recovery Console, it is necessary to configure the launch settings for each of the servers. The launch settings are a set of instructions bundled in a template that determine how a Recovery instance will be launched for each source server on AWS and what the configuration of those servers would be. (screenshot #2 below).
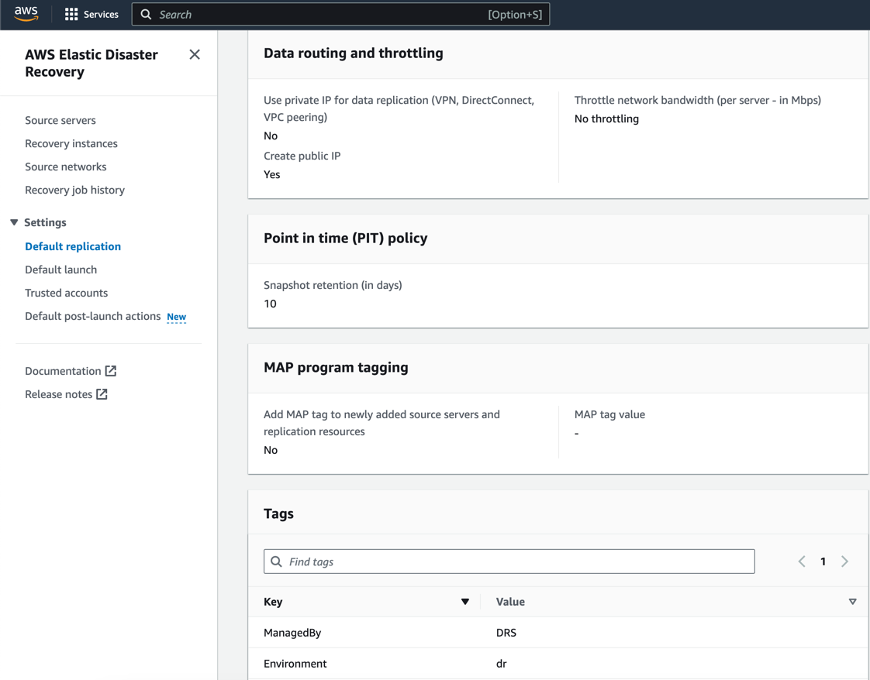
Once both source servers are added and the launch templates are configured, we can launch a Drill instance. A Drill instance refers to a practice or simulation run to test the effectiveness and readiness of your disaster recovery setup. During a drill instance, you simulate a disaster scenario to assess how well your AWS DRS configuration can recover critical data and applications in a secondary location. It is crucial to drill the recovery of your source servers to AWS prior to initiating a Recovery for the purpose of verifying that your source servers’ function properly within the AWS environment.
A drill is possible for one or multiple source servers at a time. For each source server, there will be information about success or failure of the drill. Every drill first removes any previously launched Drill or Recovery instance and used resources and when a new Drill instance is launched, it reflects the chosen Point-in-time state of the source server. After the drill, all the data replication continues as before. Any new or modified data on the source server is transferred to the Staging Area Subnet and not to the Recovery instances which were launched during the test.
Recovery Instance launch and Failback
After performing all the tests, you are ready for Recovery. The Recovery will migrate your source servers to the Recovery instances on AWS.
Finally, when the disaster is over and done, there is a possibility to perform a Failback to the original source server. It can also be any other server that meets the prerequisites by installing the Elastic Disaster Recovery Failback Client on that server. Prior to using the Failback Client, it is necessary to generate Elastic Disaster Recovery-specific credentials. Once the failback is finished, you can delete, terminate or simply disconnect the Recovery instance.
References


