
Contributors
Bala Balaiah, Data & Analytics Practice Lead
William Boyd, Data Engineer
This is part 2 of a 3-part blog series about uploading a custom ML script to Sagemaker. If you haven’t read Part 1 in the series, we recommend you start there. Part 2 will cover creating a Training Job and Endpoint for your model using Sagemaker and builds on the content covered in our first installment.
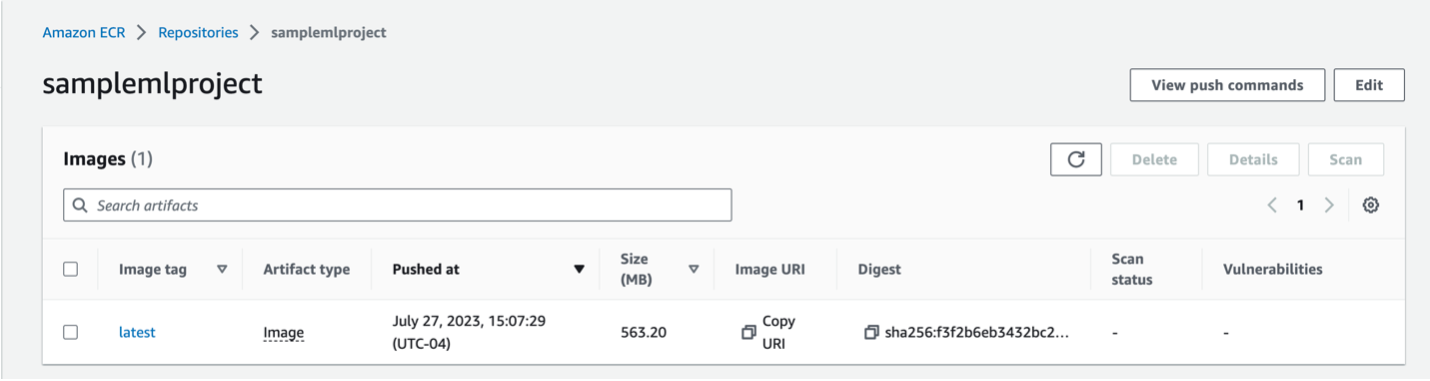
After you have pushed your container to AWS, check AWS ECR and confirm that the repository now contains your image. Once we have our container uploaded to ECR, we can begin to move over to Sagemaker. The first step we will take is to run a training job on our model. First, navigate to AWS Sagemaker, then on the left side of the screen, under Training, select Training Jobs. Here, we will create a new training job to save a model artifact into S3. So, do a training job and give it a name. For example, we called ours “iris-training-{date}” with today’s date filled in. Then, you want to choose an IAM role with access to Sagemaker, ECR, and S3. Under Algorithm Options, you want to pick Your Own Algorithm Container in ECR. Here, we will have to run back to ECR to get our container URI. You can open ECR in a new tab, and under your repositories, find the one you created for this project. Then, you should see a container with the tag “latest.” Then, you want to copy the URI for it.
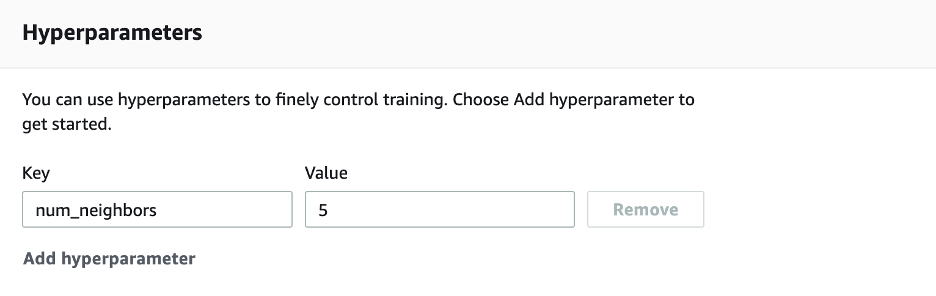
Now that we have that, go back to your Sagemaker training job. Paste the URI from our container into the box, and that is all we need to change for that section. Since this is a speedy training job, we can bring the max runtime down to just 20 minutes, as it should not take that long. Now, we need to add a hyperparameter. For our case, since our model was a KNeighbors Classifier, it would only take one Hyperparameter, which is the number of neighbors. So, select Add Hyperparameter. This data will go into the “hyperparameters.json” file our training script references. So, make sure you use the correct key that our script expects, in this case, “num_neighbors.” For our example, we will give it a value of 5.
Next, for the Input data configuration section, we will specify the S3 path to our training data. If you still need to, navigate over to S3 and create a bucket to be used for our model training. For our example, we just called it “sample-mlops-iris.” Now, within this bucket, make two others, one called “dataset” and one called “artifacts.” Then, drop your training data into the dataset bucket and copy the URI. Under “S3 Location” in the Input data configuration section, paste the URL that leads to your training data. Then, quickly return to S3 and get the URI for your “artifacts” bucket. Paste that under the Output data configuration section, and we are all set.
This training job will fetch our container from ECR and run our training script. The hyperparameters we set in the training job, as well as our training data from S3, will be fed into the script, and the resulting model will be saved in our S3 artifact bucket. After running the job, you should be able to see the results from the training job in that bucket.
After running our training job, we can now create a Sagemaker Model. Look under Inference, then Models section of Sagemaker, and select Create a new model. Please give it a name and copy our path to our container in ECR and the path to the model artifact we created in the previous step, then create the model.
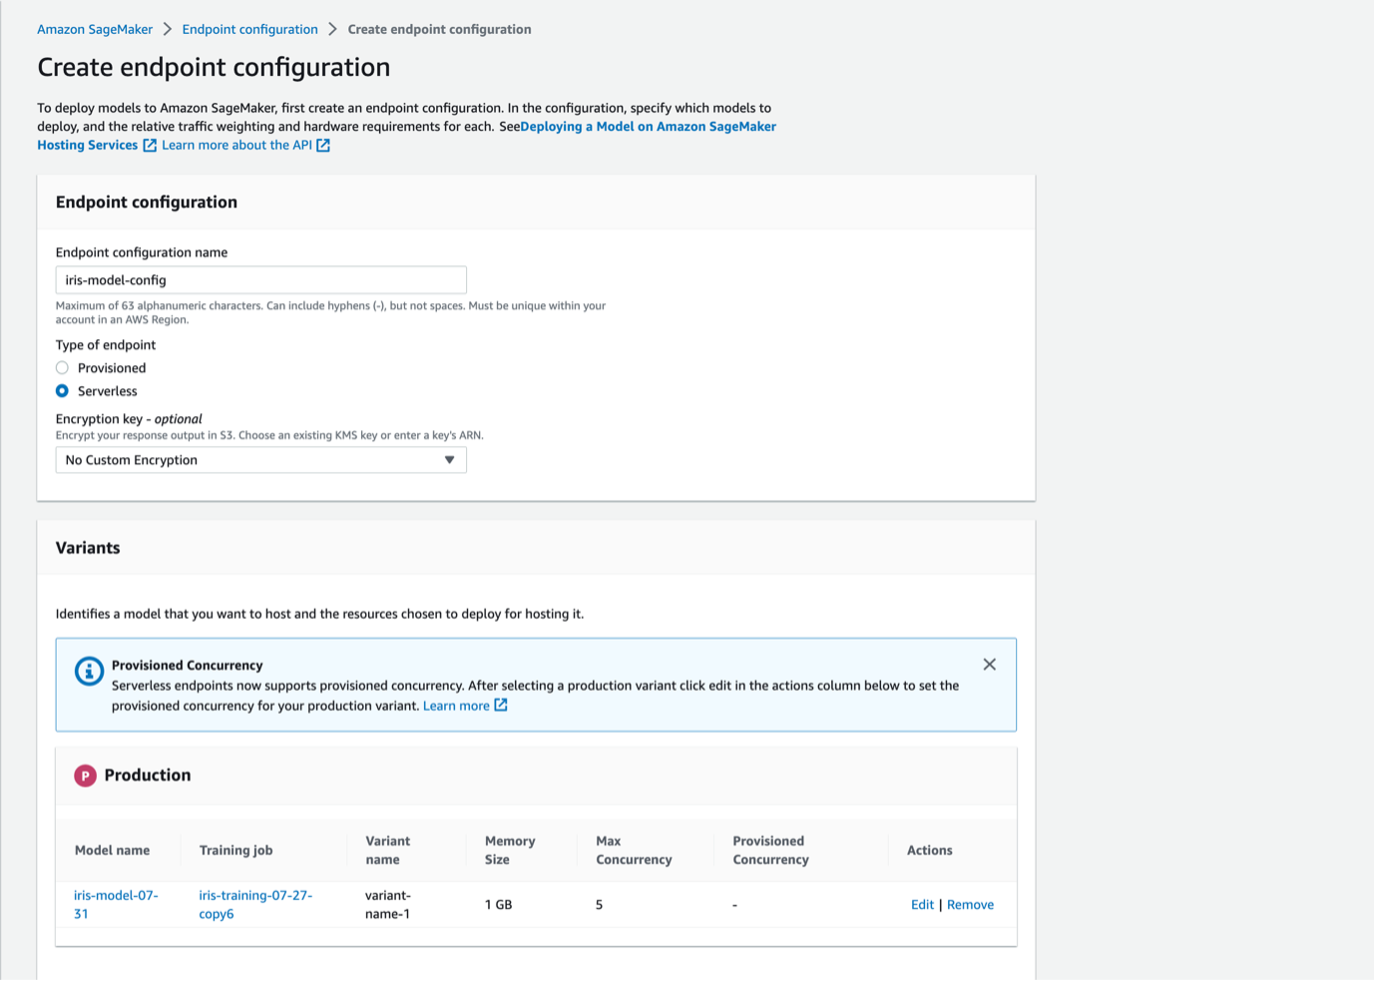
The first step to creating an endpoint is to set up an endpoint configuration. Navigate to this section of Sagemaker under the Inference tab. Create a new model endpoint configuration and give it a name like “iris-model-config.” Since this is a quick example that we will test, we do not care about the time spent spinning up instances and tearing them down, so we will select a serverless endpoint. Under variants, please select the model we created in the previous step. Then, under actions, choose edit and set the “Max Concurrency” to 5.
Now go to the Endpoint section of Sagemaker and create a new endpoint. Select “use an existing endpoint configuration” and select the configuration from the previous step. Then, create the endpoint. After a few minutes of spinning everything up, you should get a message telling you your endpoint has been successfully created. Now, we can begin to make predictions using it.


