
Contributors
Bala Balaiah, Data and Analytics Practice Lead
William Boyd, Data Engineer
This blog is part 1 of a 3-part blog post series in which we are going to walk through the steps of uploading your custom Machine Learning training algorithm and model to AWS Sagemaker. Part 1 will cover all of the files needed and the specifics of their formatting, as well as creating a Docker Image that contains your scripts.
The first step is to compile all your files. You will need two scripts: your training program, called train.py, which specifies your training procedure, and your program, which serves up predictions made by your model, called predictor.py. Included will be a few other files, which we will use to create a docker image and push it to the AWS Elastic Container Registry. For this example, we will use a small K nearest neighbors model trained on the Iris dataset.
To start, we will load all of the libraries we will be using. Ensure you have these in a file called “requirements.txt” so we can use them to build our image later. After importing our libraries, the first step is to set up the path variables. When we load our image into Sagemaker, it will load all our files into a specific structure. Our program files are under “opt/program,” and most other things are under “opt/ml,” so we have to be able to navigate there. So, we will use these paths to find other files we need later.
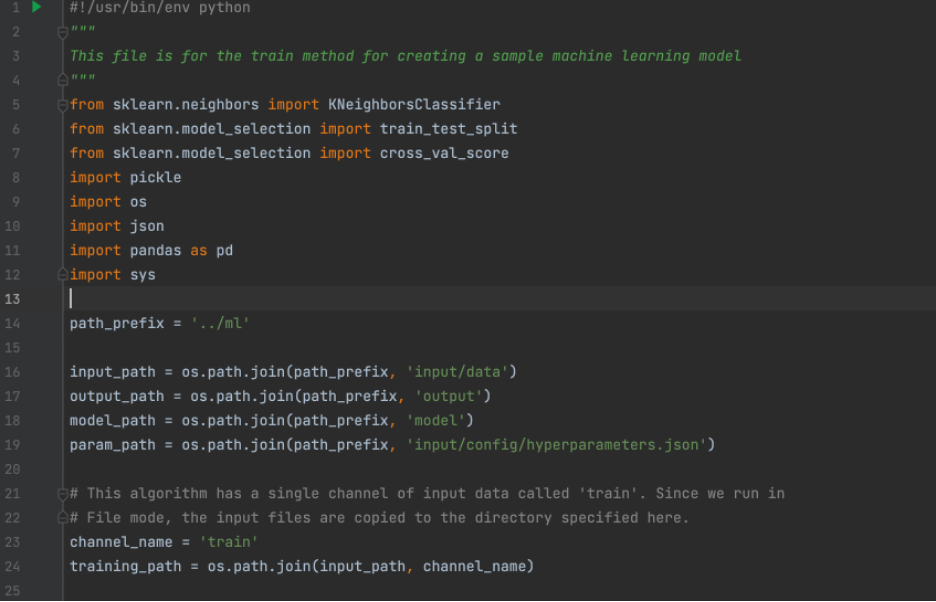
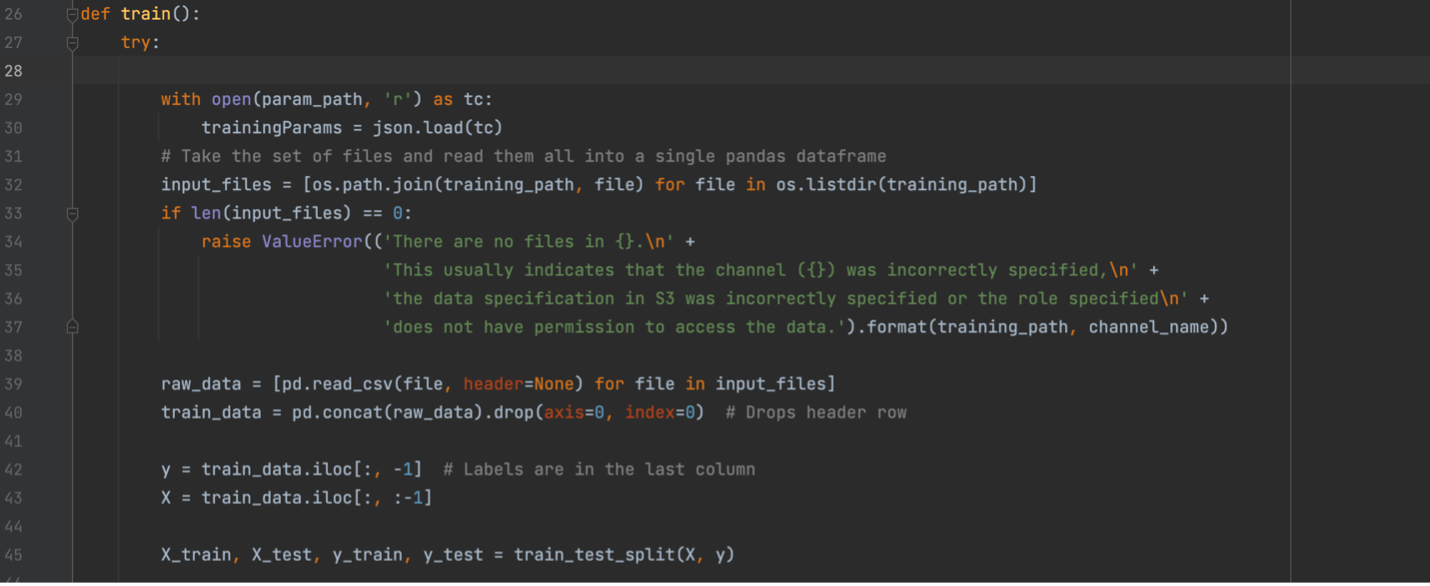
Now that our variables are set up, we can build the actual training method. We start with loading our hyperparameters from the file where Sagemaker stores them. When you create a training job in Sagemaker, you can give a name and value for a hyperparameter, and it will store them in a JSON file at the path seen below. We will then load in the value and load in our training data. The data will come from an S3 bucket, which you will specify to Sagemaker when you create your training job. In this case, we would go to S3, create a bucket called “Iris Dataset”, upload the Iris dataset as a CSV, and copy its URI. Based on how your data is structured, you will have to split it differently before dividing it into training and testing sets.
Now that we have all our data loaded, we can build and train our model. For this example, we are using the KNeighborsClassifier from SKLearn. We will then fit it to our data and pickle the model, which serializes it so we can save it to a file. This file will be saved to a specific path so that Sagemaker knows where to find it to save the model artifact to our S3 bucket.
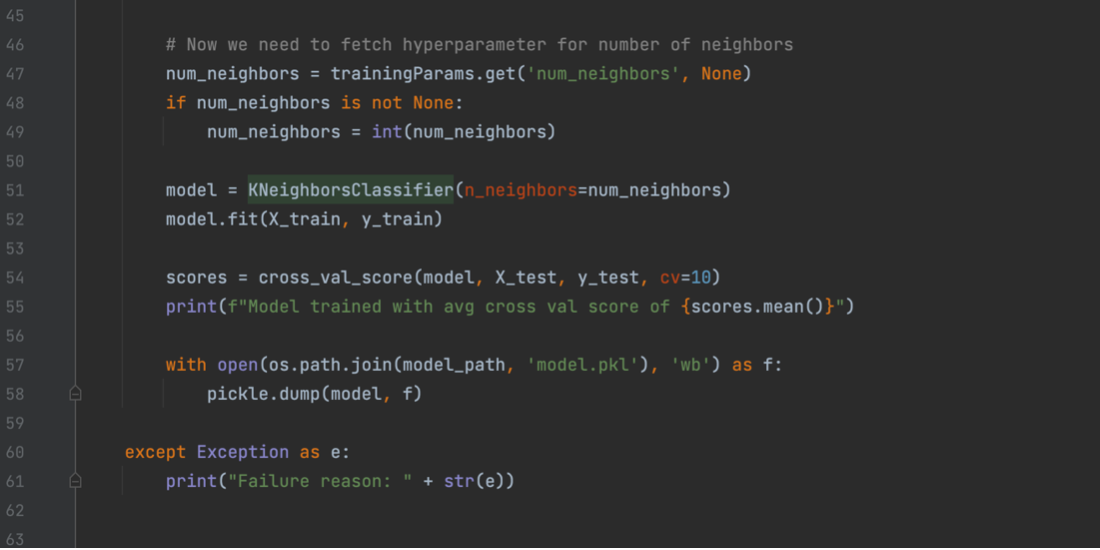
That is our train.py file completed. Before we finish, quickly go to the directory the train.py script is in remove the .py extension, and run “chmod +x train”. This will turn the file into the executable format Sagemaker expects. Now, we will take a quick look at our predictor.py file. The basic idea of the predict.py file is to create a flask app that allows Sagemaker to ping it with data to be run through the model. The file consists of two main parts, one which loads our model in from a pickle file and another which will use our model to make predictions based on data that has been input. For the first section seen below, we just create a class to hold our model and then get the flask app up and running.
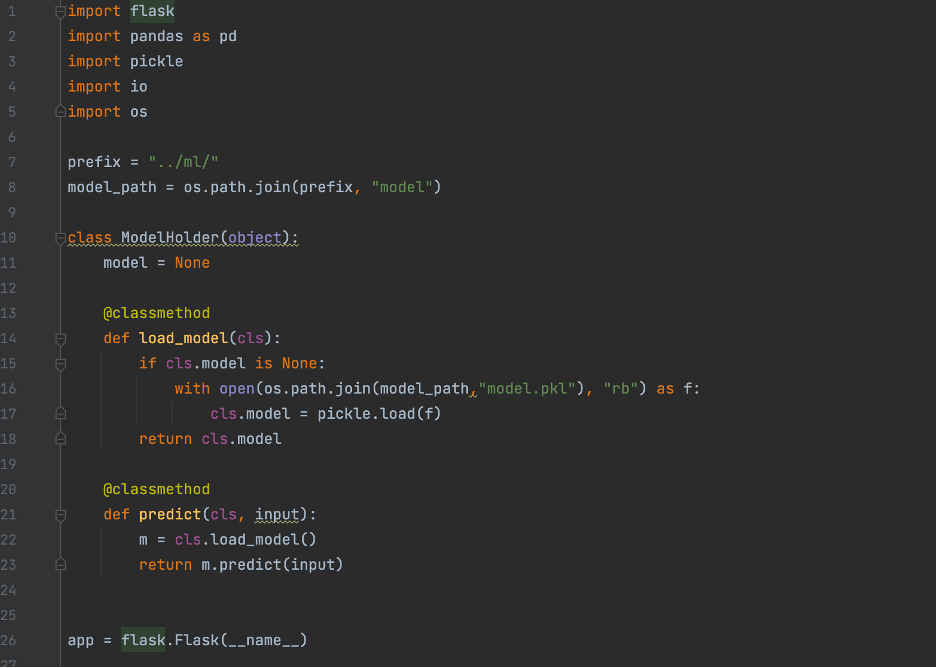
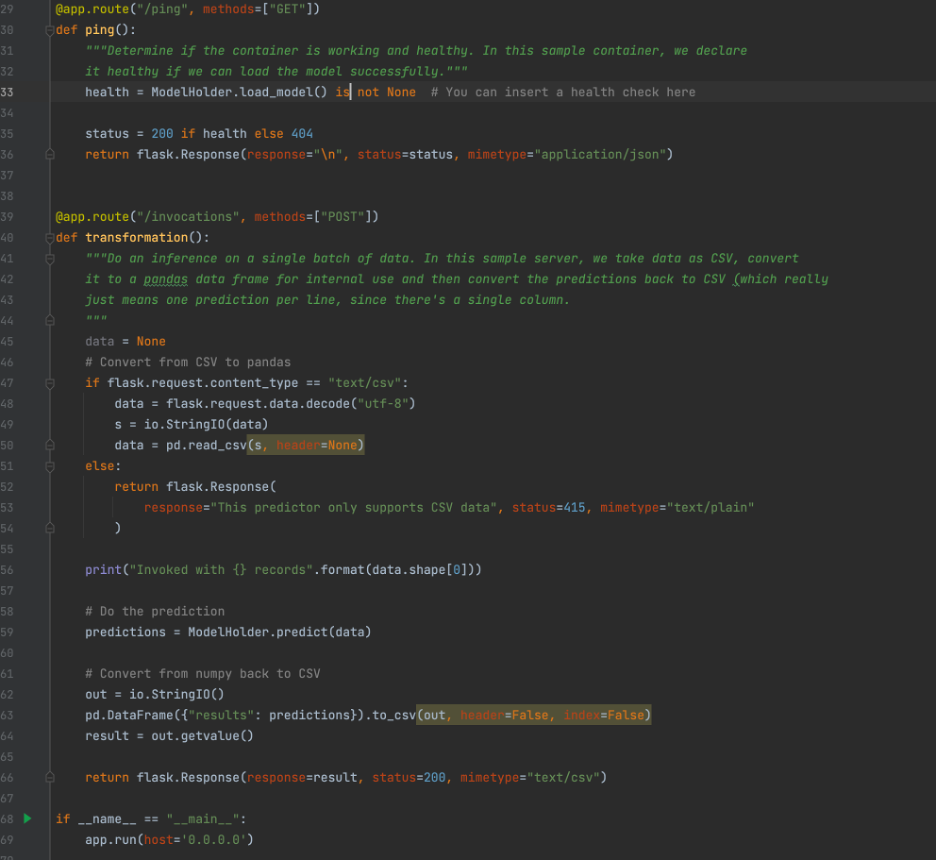
The below picture contains the rest of the predictor.py file. We have the two different functions used by the flask server. The first loads in the model from the pickle file, and the second loads in the input data and returns the predictions made by the model. For our case we expect data coming in to be in CSV format, but the code can easily be tweaked to accept JSON or other formats.
Now that we have covered our main Python programs, we will now cover a few other small files that we will be utilizing for our container. Most of these are to help with getting the webserver for inferences up and running. The file nginx.conf can be found here, and nothing about this file needs to be changed. The executable file “serve” can be found here; again, no changes are needed. And finally, the file wsgi.py can be found here. The only change needed here is to change the import statement based off what you called your prediction script.
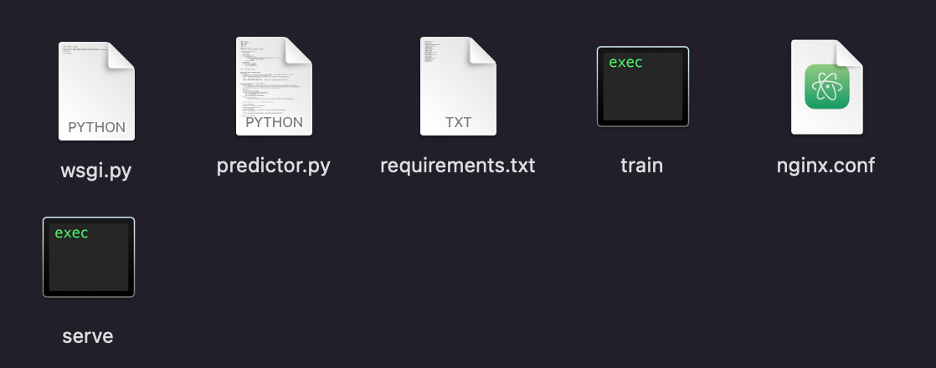
Now that we have completed all the files, we can begin creating our container. To start, we want to create a folder, in my case, I called it MLFiles, and move all the files we have made so far into it. It should look something like this.
Next, at the level above this folder, we will want to create a new text file and call it DockerFile. This will contain all the instructions Docker needs to turn all our files into a container. If you do not have Docker installed, do that before this step. Next, we will give the Dockerfile information about what version of Python we need to run, as well as how to structure our files and get our requirements loaded in. Here is an example of what it should look like.
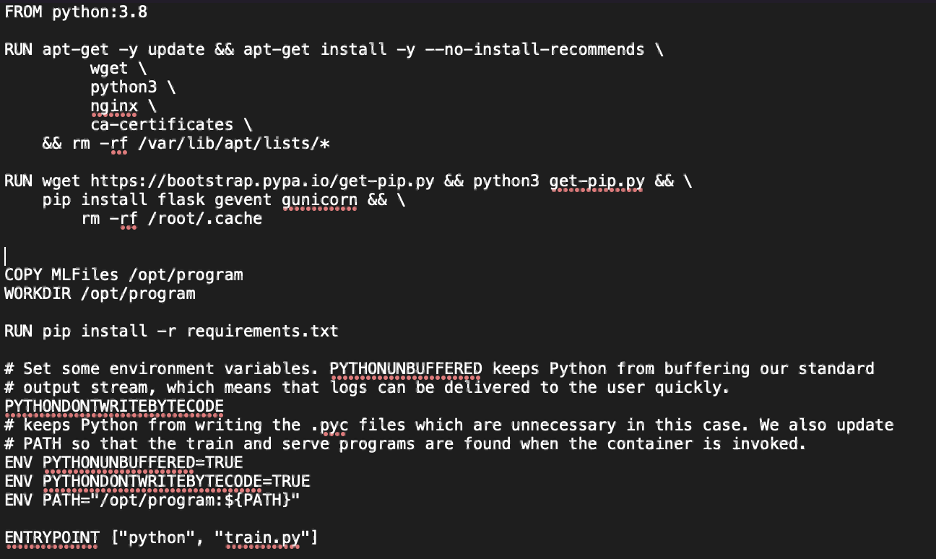
We see that it gets our Python version set up and installs all dependencies. It then copies all our files into the formatting that Sagemaker requires and sets up a few environmental variables. Finally, we give Sagemaker an entry point into our container.
Now that our Dockerfile is created, we can prepare to push our container to AWS ECR. First things first, if you have not installed AWS CLI, then you need to get that set up. You can follow the instructions here. Next, navigate to ECR and create a repository. We will refer to this repository as “projectname” in the following sections. Once that is set up, we can prepare to push to ECR.
First, open a terminal window and navigate to the folder containing your Dockerfile, then run these commands in this order, filling in any sections between curly braces with the relevant information.
docker build -t {projectname} .
docker tag {projectname}:latest {Account ID}.dkr.ecr.{region}.amazonaws.com/{projectname}:latest
aws ecr get-login-password –region {region} | docker login –username AWS –password-stdin {Account ID}.dkr.ecr.{region}.amazonaws.com
docker push {Account ID}.dkr.ecr.{region}.amazonaws.com/{projectname}:latest


